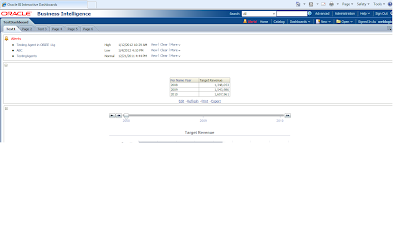
Copyright message - Edit footer in the dashboard

This assignment is based on OBIEE 11g version.

Open the Edit dashboard option. Select PDF and Print properties.


Choose Include Footer and press Edit.


Type your message 

As per your requirement you can do the customization and play around with the available options.
(Note : If you want the message not to be displayed in the dashboard but wanted the same when exported in  PDF or Excel then place your message in <NOSCRIPT>Copyright message</NOSCRIPT> with the HTML option on.)

Save the changes. And run the first page of your dashboard.


Redo the same thing for the remaining dashboard pages. 


In order to add the header/footer automatically, refer 

http://obiee1000.blogspot.in/2012/01/show-header-image-automatically.html


    Thanks.

Dropdown reports in PDF format

Step 1 :  I created 2 simple reports DD and DR.


Step2 :   I created 2 intermediate reports INT-DD and INT-DR


Step 3 : Create a dashboard prompt - 2 values - Report DD and report DR.


Step 4 : Go to Edit Dashboard


Step 5 : Save and check the dashboard.


You can save the PDF anywhere on the Local drive now.

Hide the message "Preparing Guided Navigation" in OBIEE

You might have come across with this kind of message when you use guided navigation logic.


There is a way to hide this message and the background yellow colored strip.

  Edit the two CSS files.

C:\OracleBI\web\app\res\s_oracle10\b_mozilla_4\portalcontent.css
AND 
C:\OracleBI\oc4j_bi\j2ee\home\applications\analytics\analytics\res\s_oracle10\b_mozilla_4\portalcontent.css

Look for this class marked with Black border


Edit as shown below in the CSS file at both the locations:

.PortalPreparingGuided 
{
}

This will remove the yellow colored strip.

Now we have to remove the actual message "Preparing Guided Navigation"

For that purpose go to C:\OracleBI\web\msgdb\l_en\messages\portalsysmessages.xml

and look out for this tag - 


Remove this message. 

<WebMessage name="kmsgDashboardPrepareGuided"><HTML></HTML></WebMessage>

Now restart the OBI services. You will find that the message "Preparing Guided Navigation" with the yellow strip in the background has been disappeared.

Happy Learning !!!

Change the background color and font of Grand Total in Table view

Edit the 2 css files

C:\OracleBI\oc4j_bi\j2ee\home\applications\analytics\analytics\res\s_oracle10\b_mozilla_4\views.css
AND
C:\OracleBI\web\app\res\s_oracle10\b_mozilla\views.css

Edit the class Grandtotal:


.grandtotal {
        color: #ffffff;
border-style: groove;
border-color: #000000;
border-width: 0 1px 1px 0;
background-color:#DC143C;
font-weight: bolder;
padding: 3px 2px 3px 2px;
        font-size:medium;
}

Restart the OBI services.


Have a nice day !!!

Play a video clip in OBIEE

I was actually wanted to host a virtual directory using the web logic server in OBIEE 11g and place all the video and audio files there. But I am unable to find the way as yet so for the time being here is the workaround.

Turn on the windows IIS feature from the Control panel - Install/Uninstall program section


Reboot the computer. Go to C drive and in the options - select view all hidden folders.
Find out the C:\inetpub\wwwroot and create a folder inside this location and place all your files in that folder.
For Example.


Go to command prompt and restart IIS service.
iisreset /noforce <Computer name>


The video file can be accessible using this URL-

http://USBLRNMEHANDAL1/Nachiket/123.wmv

Now go to the OBIEE11g or 10g ( I am using Internet Explorer )
Go to Edit dashboard and add Text object.

Put this kind of code: 


<html>
<body>
<embed src="http://USBLRNMEHANDAL1/Nachiket/123.wmv" width="420" height="250" CONTROLLER="true" LOOP="false" AUTOPLAY="false"></embed>
</body>
</html>

Don't forget to check the HTML box.

Save the changes .

Play the video on this dashboard page :-)


Enjoy and let me know if anybody knows how to deploy a virtual directory in web logic server with steps.


Thanks.


Displaying Alerts on the dashboard pages


How do I show all my Alerts on the first page of dashboard ? 

Go to the first page of the dashboard and add one section.
Rename  the section as _Delivers


Save. If you want you can add Alerts on any of the pages.


Change the color of the drop down list values

Look at the requirement.


The values in the drop down list are having black color by default.
The requirement is to change the color to red for all the drop down list values.

We have to edit 2 css files.

C:\OracleBI\oc4j_bi\j2ee\home\applications\analytics\analytics\res\s_oracle10\b_mozilla_4\views.css
AND
C:\OracleBI\web\app\res\s_oracle10\b_mozilla\views.css

Look for this class in .ViewTable{ }

SELECT {
     
font-family: arial, helvetica, sans-serif;
font-size: 8pt;
   
}

Edit 

SELECT {
        
font-family: arial, helvetica, sans-serif;
font-size: 8pt;
        color: #FF4500; 
}

Save the changes. Remember you have to make changes in views.css that is present in both the locations as mentioned above.

Restart the OBI services.
Clear the cache, refresh metadata and files.


Have a nice day !!!

Custom date time in Title view - Part 2

Customizing Date time format in Title view. 

In part 1 we had created one non system session variable in the RPD and used it in the title view.
In this part we will be using system session variable.
I am going to edit the Title view of the report 'Date format in Title view' 


Put the below string next to Subtitle -

@{system.currentTime}[DD-MM-YYYY,HH:mm:ss tt]

Check the box 'Display Saved Name' below the "Title" option so that name of the report will appear along with the customized time.


Good day !!!

Dashboard page colour turns yellow

Open any tab and rename :

 I renamed the tab – Page 2

<html><body style="background-color:yellow">Page2</body></html>

Save.


Background color – Yellow will be applicable to all the pages.

Direct database request in OBIEE - Part 3


Example No 3:  Calling the database function from the OBIEE Answers

Below I have written an oracle function which accepts 3 input parameters & return 1 output column.
Function name is FIND_CUSTID. Input parameters are Customer first name, Customer last name & Customer birth year & output parameter (Return value) is Customer ID.
Note: Ensure that function return SINGLE value for the unique combination of INPUT parameters.


Let us check by calling the function from the oracle database itself just to check if it is working fine or not.


In OBIEE Answers, we will create the dashboard prompts on the columns Customer First Name, Customer Last Name & Customer Birth Year. In the Direct database request, we will call the function FINDCUSTID which will return the customer id with respect to the combination of parameters selected from the prompt.

Let us create a direct database request. (Report name is Calling a function using DDR)


Presentation variables-

     A-     Customer First Name
     B-      Customer Last Name
     C-      Customer Birth Year

Function Call –

SELECT FIND_CUSTID ( ( @{A}{'Abel'} ),( @{B}{'Aaron'} ),( @{C}{1960} ) ) as CUSTID from DUAL

Let us create the dashboard prompts for the columns- Customer First Name (uses Presentation variable A), Customer Last Name (uses Presentation variable B) and Customer Birth Year (uses Presentation variable C)
Ensure that only 1 value is returned for the combination of customer first name, customer last name and customer birth year and therefore we have put constraints.

Prompt is saved with the name Function prompt.


Note:  As mentioned in the example 2 – we have to put the single quotes around the columns Customer First Name & Customer Last Name. (Not required around the column Customer birth year since its data type is numeric). 


Set the presentation variables for the respective columns. Do not select the all choices option.
Click the Constrain check box.
It is not required to set the default values as in the database function call we have passed the default values for the 3 input columns.
Set the appropriate labels.
Preview the Prompt.


Now let us go back to dashboard page and pull the Function prompt and the direct database request calling a function using DDR


You can see the customer ID (14762)- This has been returned by the function FIND_CUSTID and the default values we passed to this function.
Select some other combination – Don’t leave any prompt empty. Make selection from all the prompts.


To clear the selected values in the prompt you can click on the Page settings option & click on “Clear My Selections” and select some other combination.


You can see a button below the prompt with the name “Clear”. This does the same job as the “Clear My Selections” option.

To add this button- open the dashboard creation console-Below the prompt Function prompt- add one Text object & paste the below JavaScript there.

<div class="XUIPromptEntry minibuttonOn"><a href="#" onclick="return PersonalizationEditor.removeDefaultSelection(false )">Clear</a></div>

Note: Don’t forget to select the “Contains HTML Markup” 


Press “Clear” button to clear the selected values in the dashboard prompt.
Alternatively you can use the guided navigation so that the second section (Customer ID) will appear only when function returns a single value for the combination of customer first name, customer last name & customer birth year. You have to make selection from each prompt.


Have a nice day !!!!


Direct database request in OBIEE - Part 2


Example No 2:  Playing with Direct database Request and the dashboard prompt

I want to select the customer name from the dashboard prompt & display it along with its last name using the sql in Direct Database Request option. Let us see how we can achieve this.

Look at the below SQL in DDR.


SELECT ( @{Cust_Fname_Var}{'Abel'} ) AS Customer_Firstname, CUST_LAST_NAME  FROM CUSTOMERS

Cust_Fname_Var is a presentation variable and the default value is ‘Abel’. Also I observed that specifying default value was something required. And note the spaces between the brackets in the sql.
I have saved this report with the name “Customer First/Last Name”
Let us create a dashboard prompt on the Customer First Name column.


Now I will pull the prompt and the report on the dashboard.
Note: Abel was the default value of the customer first name.


Let us select some other first name & see what happens.
I have got the error. See the details below-


The workaround is we need to put the single quotes around the Customer First Name.
So we have to do the necessary modifications in the SQL for the Customer First Name prompt.
Use the below SQL in the prompt.

SELECT CHAR (39) ||CUSTOMERS.CUST_FIRST_NAME||CHAR (39) FROM SA2 


(Note:  39 is the ASCII code of single quote character (‘) & the function CHAR (number) - Converts a numerical value between 0 and 255 to the character value corresponding to the ASCII code)

Preview the prompt. Observe the single quotes around the customer first names. 


Save the new changes to the prompt & go back to the dashboard.

Now it is working –
Few examples - 


Example 3 is shown in part 3.